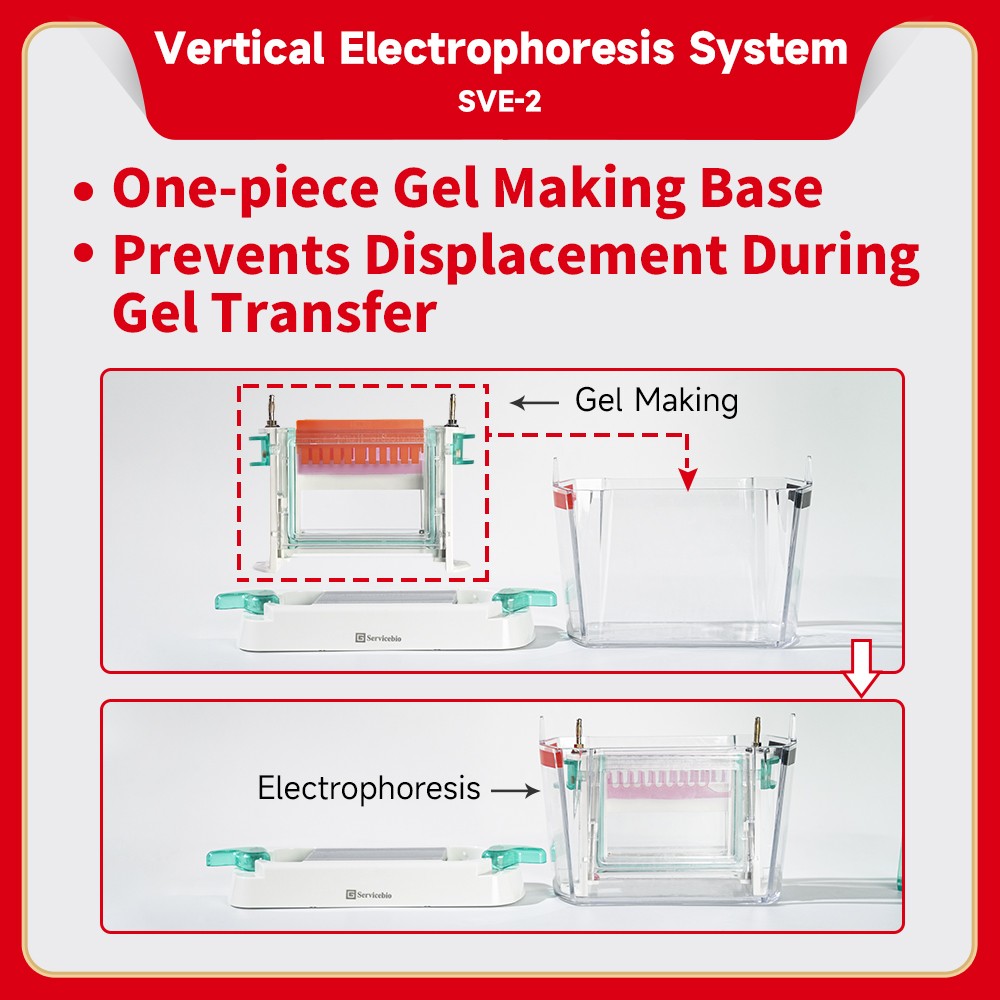
Electrophoresis System (Vertical)
Electrophoresis System (Vertical)
SVE-2 SVT-2 Electrophoresis Tank Instruction- User Manual.pdf

SVE-2 SVT-2 Electrophoresis Tank Instruction- User Manual.pdf
Electrophoresis Tank (Vertical)
1.Product overview
Electrophoresis technology is widely used in biological research, analytical chemistry, clinical chemistry, toxicology, pharmacology, immunology, food chemistry and other fields.
In a DC electric field, the phenomenon in which charged particles move toward electrodes with opposite signs is called electrophoresis. Small molecules can be separated and analyzed by electrophoresis, and electrophoresis is commonly used in modern medicine to study proteins, nucleic acids, enzymes and even virus cells.
Electrophoresis can not only be used for protein separation and content determination, but also has many new applications in immunological experiments. For example: Hepatitis B antigen (HBAg) electrophoresis assay for the diagnosis of hepatitis B, alpha-fetoprotein (AFP) electrophoresis assay for the diagnosis of primary liver cancer, etc.
2. Product Features
a. Using the in-situ gel-making mode, the gel-making and running process can be completed without disassembling and assembling the electrophoresis glass, and it is compatible with the running and electrophoresis requirements of the pre-cast gel products of this model.
b. The glue base is specially designed and locked by non-spring buckles to avoid glue leakage caused by insufficient spring pressure or aging.
c. The uniquely designed card plate is matched with the whole gland, so that the glass plate can be sealed by squeezing the sealing strip, avoiding the phenomenon of liquid leakage due to the side card not being lifted in place.
d. It can be adapted to glass plates and glue-making combs with various thickness intervals (1.5mm, 1mm , 0.75mm) to meet the needs of different sample volumes.
e. This electrophoresis instrument requires less electrophoresis buffer, and a minimum of 300mL can complete electrophoresis experiments.
f. Can be used with SVT-2 transfer electrophoresistank..
3. Product Specifications
|
SVE-2 |
SVT-2 |
|
|
Dimensions (L*W*H) mm |
185x108x125 |
185x108x125 |
|
Gel size/transfer size (mm) |
Gel size 83x73 |
Transfer size 70x90 |
|
Maximum volume of buffer (ml) |
500 |
500 |
4. Operation steps
This electrophoresis tank can complete the gel preparation and running of two electrophoresis gels at the same time. Before making glue, please make sure that the concave glass, flat glass, main frame, glue maker and other components are clean and dry, and ensure that all glass edges without missing angle.
4.1 Preparation
a. First, moveboth sides of cardplates to the bottom, completely open the two sides of the cover, insert the concave glass and the flat glass from the diagonally above and place them to the bottom, and the upper part of the glass is stuck in the card slots on both sides.
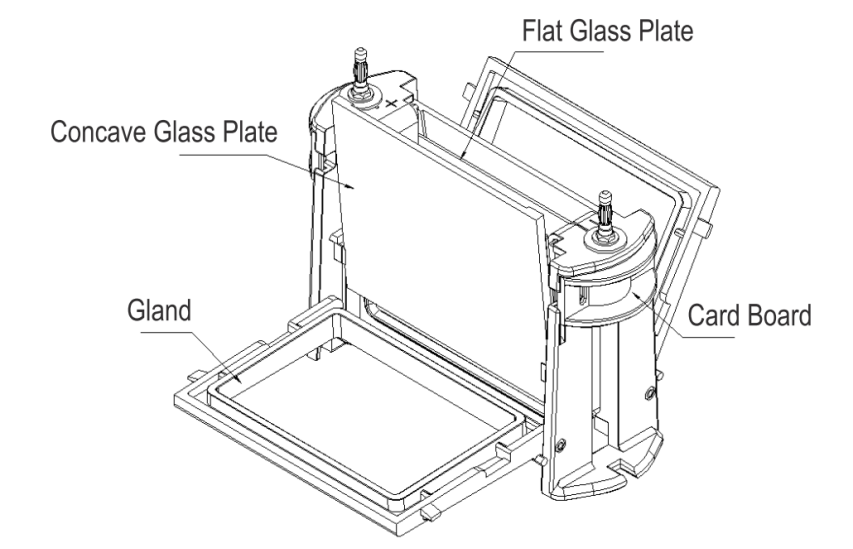
b. Turn up the glands on both sides, pinch the left part of the gland at the same time with your hands,pull the left card plate upward clamping to the top till a click sound;Then pinch the right side of the gland at the same time,pull the right card plate up to the top till a click sound.
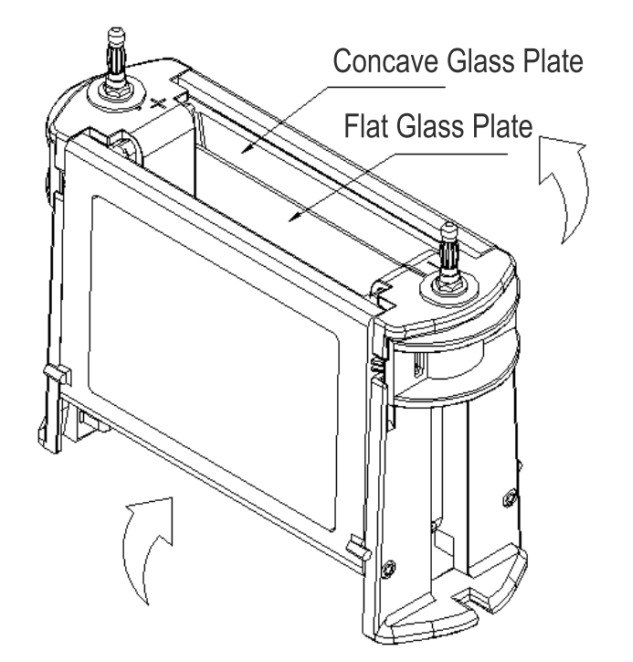
Notice:
Before the experiment starts, it is necessary to check whether the concave glass and the flat glass are aligned up and down, whether the bottom of the glass is placed all the way, and whether the pressure plates and buckles at the upper and lower ends of the glass are locked in place.
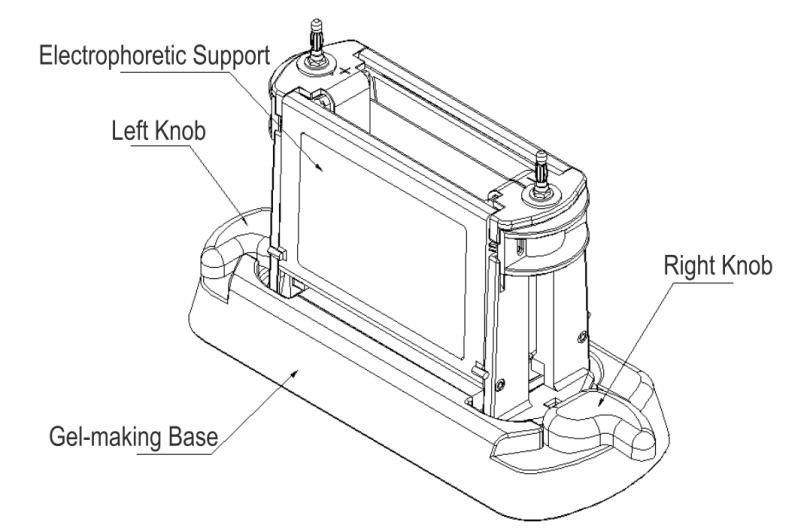
c. After confirming that the electrophoresis glass is tightly aligned, unscrew the knobs on both sides of the gel base (as shown on the right side of the knob in the figure below), and then put the electrophoresis support in the middle of the gel base and clamp it, and then press the main support with your hands. And tighten the knobs on both sides until the rotation reaches the limit (as shown on the left of the knob).
Note: The main body of the electrophoresis stand can be installed and used on both sides.
4.2 Gel making
Slowly inject the prepared gel solution into the gelchamber between the two glass plates to 2/3 to 3/4 of the glue chamber (depending on the actual experimental needs), and then use double distilled water or anhydrous ethanol to evenly back and forth. Add to the gel chamber so that it seals (be careful when adding samples to avoid air bubbles). Let stand for about 20 min to 1 h to wait for the gel to polymerize, pour out double distilled water or absolute ethanol, and use absorbent paper to clean the residual liquid in the gel chamber.
Fill the gel compartment (up to the top edge of the plate glass) with the formulated stacking gel and insert the loading comb. Let stand for 30-45min and wait for the gel to polymerize completely.
4.3Sample Loading
Rotate the knobs on both sides of the gel base (as shown on the right side of the knob in the above figure), take out the main body of the electrophoresis support and put it into the electrophoresis tank. There is a buckle on the left and right sides of the bottom of the sink, and one side is provided with an anti-reverse column to prevent it from being reversed. It is necessary to align the buckle and the anti-reverse column at the same time and insert it at an angle of 20°. There are red and black marks, corresponding to the red and black marks of the electrodes).
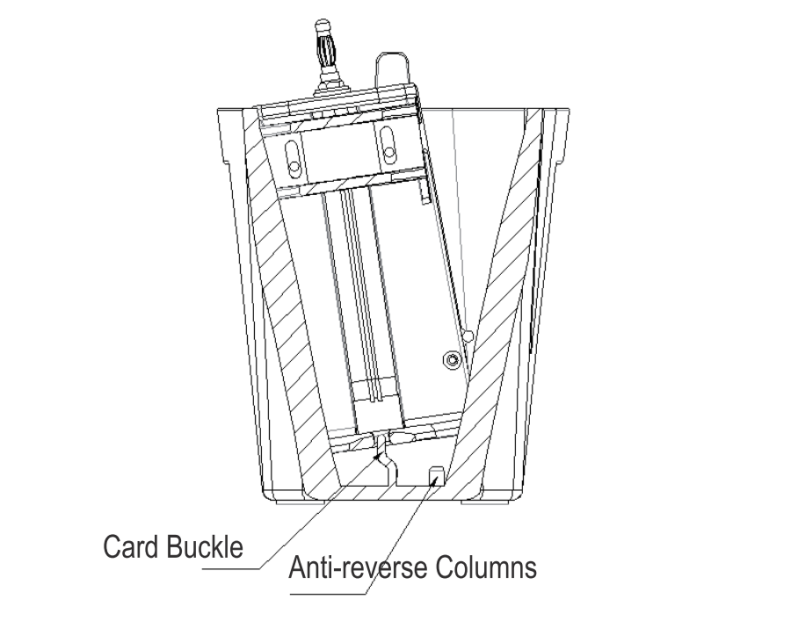
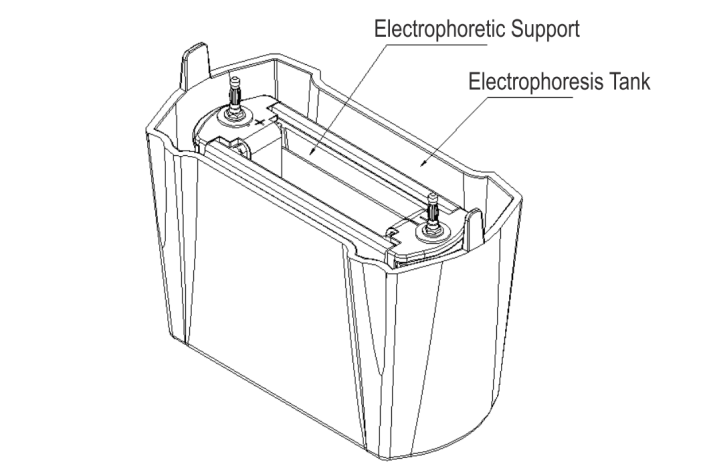
Inject the electrophoresis buffer into the main cavity of the electrophoresis stand (between the two sets of glass), and the liquid level should be the same as the upper edge of the concave glass. Carefully pull out the sample addition comb in the gel glass, and check the sample addition hole to ensure that there is no residual glue or air bubbles in the sample addition hole. If residual gel is found, blow it off with a blowpipe and blow out the air bubbles in the sample hole. Add the sample to the spotting hole according to the experimental needs to complete the spotting step.
4.4 Electrophoresis
Cover the top cover according to the correct position of the positive and negative electrodes (red is positive, black is negative), insert the electrophoresis wire into the electrophoresis power supply according to the correct color, and select the appropriate voltage and current to start electrophoresis (the specific electrophoresis parameters are adjusted according to the actual experimental parameters).
5. Product configuration list
|
serial number |
name |
quantity |
|
1 |
Electrophoresis scaffold body |
1 set |
|
2 |
Gel base |
1 set |
|
3 |
Electrophoresis box |
1 set |
|
4 |
1.0mm electrophoretic glass |
2 sets |
|
5 |
1.5mm electrophoretic glass |
2 sets |
|
6 |
1.0mm 11 tooth sample adding comb |
2pcs |
|
7 |
1.5mm 11-tooth sampling comb |
2pcs |
|
8 |
Glass replacement plate |
1pcs |
|
9 |
Gel cutting board |
3pcs |
|
10 |
Prefabricatedgel seal |
2pcs |
Precautions
1. The main components of this series of products are fragile products. During packaging, transportation and use, be careful not to bump or drop the product, which may cause damage to the product and cause the product to fail to work normally.
2. Metal parts such as platinum wire and electrode column in this product should be paid attention to whether there are oxidation, breakage, loosening and other problems during use, cleaning and maintenance. Please replace and maintain them in time. The platinum wire is easily broken, so be careful when handling it.
3. After daily use, please wash it with deionized water in time, and place it in a dust-free place to dry for use.
Use collapsible tabs for more detailed information that will help customers make a purchasing decision.
Ex: Shipping and return policies, size guides, and other common questions.